Saturday, January 28, 2012

Beads in a basket

I've been making baby beaded bracelets and my beads needed a new home. So to the basement I went and found a basket. Now all my beading supplies are safe and sound. And a little reminder of what's hiding in the basket!

Jessie and I love to use alphabet stickers.

Now maybe I will remember where I put those beads!

These beads are great to keep around for children who might be visiting!

Quick way to dust those cabinets!


Keep a dry paintbrush handy to dust your kitchen cabinets. 
I don't dust often but this makes it much easier. It's cheap and a time saver!
Also works on baseboards and louvred doors.
Happy dusting!

Thursday, January 26, 2012

Cover a Matchbox

Each box can hold a special treat!
What could you put in yours?

We used to cover matchboxes to make them look like little presents,
and hang them on our Christmas tree.
I was needing something to put a baby bracelet in, and I thought of these.
Well, what really brought it to my mind was the Valentine matchboxes you can find on my Pinterest. Now those are cuties! But I thought these weren't half bad either.
I was so into this I didn't snap any pics, but I will later. Still working on getting them perfect!


Great way to use your leftover scrapbook paper!


Bought the matchboxes at Walmart, they were a box of 6 for .77 and
that means each little box cost about .15 cents each! 


Tuesday, January 24, 2012

January Pinterest Party!

Yeah! I am so excited! I've been invited to my first-ever Pinterest party!

Here's how it's gonna work:

8 or so crafty pinners getting together at the hostess home.
Hostess decides "theme" for the party and creates board for the party. (where we all pin our party ideas)
Each person brings something yummy, from Pinterest of course.

Follow me on Pinterest and check out our "January Pintererst Party" board!
(how many times can I say Pinterest, count'em, so Pinteresting!)

Pin It


Monday, January 23, 2012

One Pink Bootie

I have always loved wool felt. So, I'm not quite sure why I never learned the art of felting.  Maybe because it looks so time consuming and complicated. I have a friend who's willing to teach me...maybe someday.

I did try my hand at making a pair of cotton felt booties. Well, actually one felt baby bootie. 


I bought a Simplicity pattern and a 59 cent piece of cotton felt. The felt that's already cut into a small square, and used embroidery thread I already had at home.
I was just playing around with the shoe, thought maybe if it turned out really great, I would make a pair of real wool felted booties.  For some reason, I only made this one. 
(I have a closet full of unfinished projects!)  

Well the little bootie has found a home (or foot I guess I should say).  One of Jessie's friends, Jill, just had a baby girl and she wants to learn to make these. So I was very happy to turn the project over to her! Baby Tillie will soon be kicking around in her new boots! One of many pair I'm sure she will have!


My lucky find at TJ Maxx last year!
Wool felted change purse and only 3.99!
Fits my ipod perfectly!


One unfinished felt project.
One felt project someone else finished.
Thanks someone else!


Sunday, January 22, 2012

Newborn Beaded Bracelets

Here is the pic of Jack's bracelet he wore as a newborn. Well actually it's the third bracelet I made for him. Jessie and I lost the first two.  One was lost at her house before she went to the hospital. The other I lost after taking it to the hospital. Even made it into the room before it disappeared. The third bracelet finally made it onto his arm!


I suppose Jessie thought she's better snap a pic before it went awol again!


This beautiful little girl is Miss Tillie. She is happily wearing a beaded bracelet of her own!
(photo by Brittany Toomey)

Sweet Tillie baby

There might be a little 6 lb newborn sporting one of these in Chattanooga today!
Welcome to the world Miss Mia!


Saturday, January 21, 2012

Yarn Chandelier-It worked!

I have been wanting to make a yarn chandelier.  After reading some comments on blogs that sometimes the yarn will collapse, I wasn't sure it would work! But yeah! Believe it or not, I have a perfect orange yarn chandelier after the first try. Guess I better get to work on more of these for Jack's birthday party!

Here is a note that may be important. I saw on one blog, that you should coat the balloon in petroleum jelly before wrapping the yarn around it. I decided to go with this method and it worked so I will probably use it each time. I only used a small amount and smeared it over balloon with my hands. (After I blew up the balloon!)

Next I made a mixture of children's craft glue and water. I didn't have enough glue so I used "Puzzle Saver" to mix in with it. The Puzzle Saver glue was very sticky! I think it might have been the secret to it working well!

I cut long strings of thin yarn I had on hand, dipped it in the glue mixture and wrapped it around the balloon. I wrapped some of the yarn vertical and others pieces horizontal.  I just randomly put it on.

After drying for 12 hours I checked on it and...the glue did not stick to the balloon!

This was so exciting and it didn't require a lot of effort, time or money. Maybe I just lucked out but...if I can do it so can you!

These are the items I used. This is messy so you will need newspaper.
When it's hanging to dry, the glue will drip so be sure to put newspaper
under it. I used puzzle saver and all purpose glue.

Bella carefully pushed around on the yarn to make
sure it wasn't stuck to the balloon. It wasn't at all!


Bella did the honors of bursting the balloon!
We were nervous!

So excited to have a perfect yarn sphere!

How cute will this be hanging up with lots of others!

Friday, January 20, 2012

Recover an office chair


Before and After
This is a cheap-oh office chair, but we do use it every now and then. It was either cover it or trash it. I saw one on pinterest and decided to try it on my own, didn't even look a the tutorial.
If I can...you can too!


I began with this Chevron fabric I found at a local
fabric outlet. Only 7.95 a yard and it's 54 in wide!
So, fabric for this project was only about 2.50! Yeah!
The color is blue but these pics are not showing it very well.

This is the back of the chair. Remove the two screws you see in the photo.
This is what it will look like after you remove the screws
and pop the cover off.  It was easier than I thought.

Cut your fabric and use either staples or glue. I used a hot
glue gun as our staple gun seems to have gone awol.

Use a flathead screwdriver to help squeeze it back together.
(More like popping it back together!)

The screwdriver will also help get any wrinkles out that
are still there. Just keep poking it down into the plastic cover!
The seat of the chair is similar to the back of the chair. It will have more
screws to take out and you need to take off the arms of the
chair as well. Mine had a total of 10 screws.  Don't let taking the arms off intimidate you, it was easy.
Hot glue or staple just like you did the back of the chair.
Then pop the plastic over on.
This is the bottom of the chair.
Note that I forgot about the screws going back in.
Had to cut openings so don't forgot to pay attention when you take it apart!
Finished product! Only took me about an hour!
I think it's going to stay with us now!

Wednesday, January 18, 2012

Add some rick-rack to burp cloth!

Adding rick rack to a burp cloth is worth the effort.
Just look at the difference between the left and right edges!


These are scraps of fabric I used. Just cut strips and sew.
Do not measure, you want them  to be uneven.
My daughter and her friends give this method a thumbs up!

It is not difficult. Just tuck the rick rack in as you sew.


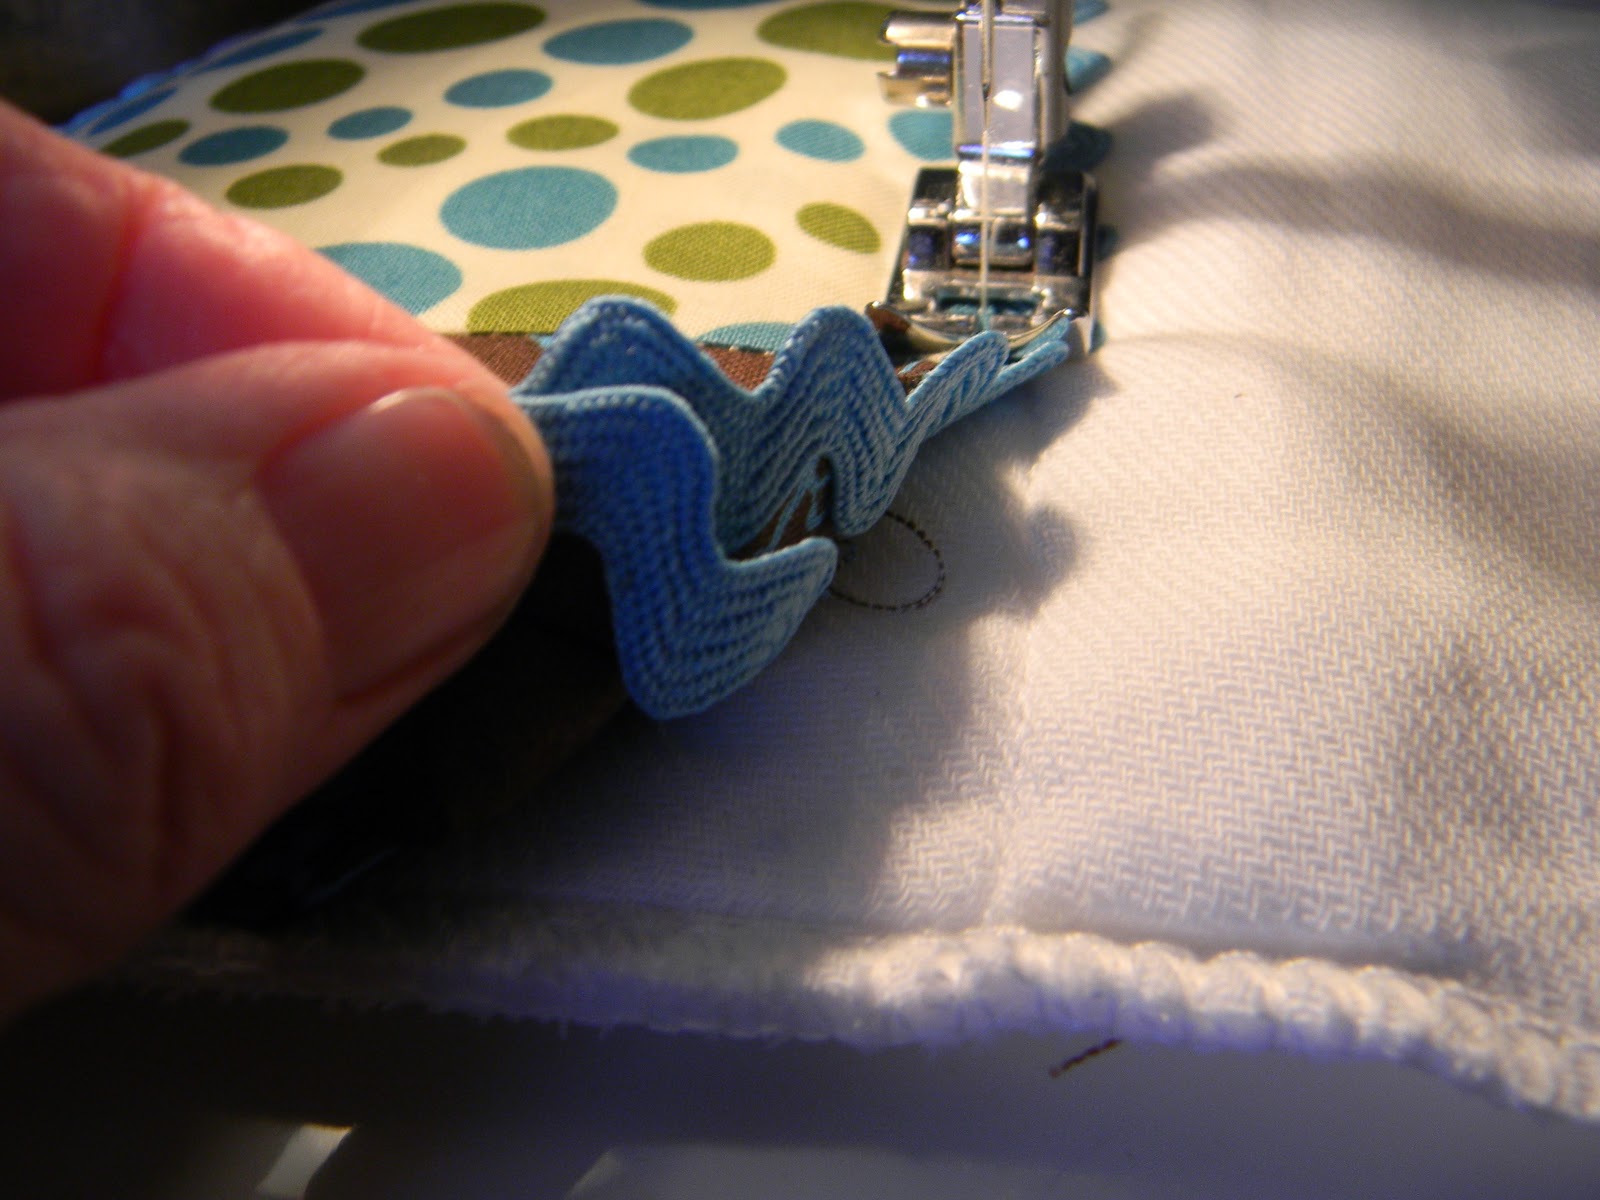
Fold the rick rack under as you finish the edge.
(disregard the unmanicured fingernails!)


Finish the edge as best as you can. After they have
been in the laundry, the diaper crinkles and it will look fine.
Remember babies are going to be spitting up on it!
It does not have to be perfect.

Do try to match the rick rack when folding it under.


Fold and press the bottom edge before sewing.
The diapers are not always straight, so just work with it.

Finished! Ready to gift to another new mom!


You can also use ribbon for the edges...or sometimes I use piping.


Love the sunny yellow polka dots!


Monday, January 16, 2012

Secret Church


Dr. David Platt's "Secret Church" is going on my ipod tonight. Amazing young minister from Birmingham. I heard him in Nashville several years ago and his messages are life changing. You can find all of his teaching on itunes. You will not regret it! Go here for Secret Church link.

I Heart You (Pinterest!)

I was looking for a Valentines Day card at Target a couple of weeks ago. Picked up one for baby Jack but a few seconds later I put it back. Should I buy a card for Jack, I don't think so. I wanted something he would actually look at. What 10 month old wants a card from his Granna. And...what Granna want to give her Jack just an ordinary Valentine.

I had an idea from Pinterest that I thought was perfect. So finally today, it's ready to be mailed!A little side note here, if you are going to make one of these, it will need a larger envelope then you might think so be prepared! I didn't get to use the cute turquoise one. Sad face here because the envelope is almost as important as what's inside!

Make one for your little friends instead of buying a card. It is sure to bring a Valentine grin to their face!

Fold and cut your hearts just like you did in grade school. 

My hearts were red, pink and orange. I used orange and red thread.
You could use contrasting colors as well.

On your machine, sew your hearts in one straight line.

I used scrapbook paper. It sews very well.
But construction paper would work too.

Looks cute on the porch outside.


Add a handwritten note or poem...and mail it off!